
TM 5-3810-300-24&P-3
Fuel Injector 2.1.1
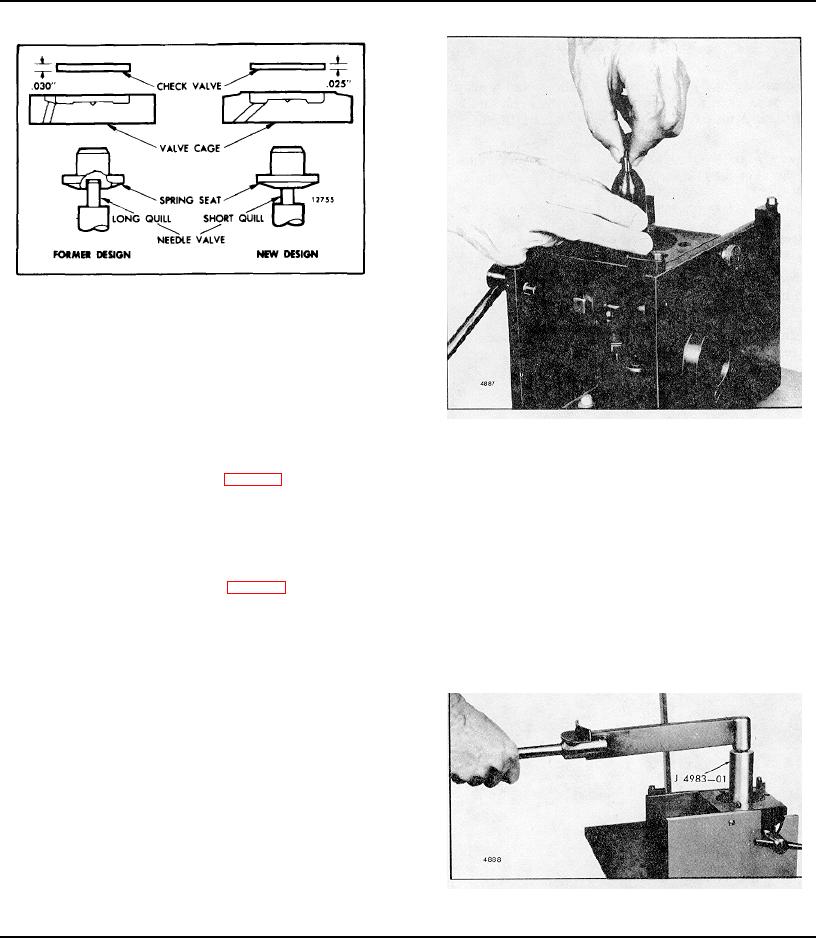
Fig. 38 Comparison of Former and New Design Injector
Parts
CAUTION: Be sure that no compound is
accidentally placed on the lapped surfaces
located higher up in the spray tip. The
slightest lapping action on these surfaces
can alter the near-perfect fit between the
needle valve and tip.
Fig. 39 Tightening Injector Nut by Hand
Before reinstalling used injector parts, lap all of the sealing
6. Place the dry part on the second block. After applying
surfaces indicated by the arrows in Fig. 31. It is also good
lapping powder, move the part lightly across the block in a
practice to lightly lap the sealing surfaces of new injector parts
figure eight motion several times to give it a smooth finish. Do
which may become burred or nicked during handling.
not lap excessively. Again wash the part in cleaning solvent
and dry it with compressed air.
Lapping Injector Parts
7. Place the dry part on the third block. Do not use lapping
powder on this block. Keep the part flat and move it across
Lap the sealing surfaces indicated in Fig. 31 and Table I as
the block several times, using the figure eight motion. Lapping
follows:
the dry part in this manner gives it the "mirror" finish required
for perfect sealing.
1. Clean the lapping blocks (J 22090) with compressed air.
Do not use a cloth or any other material for this purpose.
8. Wash all of the lapped parts in clean fuel oil and dry them
with compressed air.
2. Spread a good quality 600 grit dry lapping powder on one
of the lapping blocks.
3. Place the part to be lapped flat on the block as shown in
Fig. 33 and, using a figure eight motion, move it back and
forth across the block. Do not press on the part, but use just
enough pressure to keep the part flat on the block. It is
important that the part be kept flat on the block at all times.
4. After each four or five passes, clean the lapping powder
from the part by drawing it across a clean piece of tissue
placed on a flat surface and inspect the part. Do not lap
excessively (refer to Table I).
5. When the part is flat, wash it in cleaning solvent and dry it
with compressed air.
Fig. 40 Tightening Injector Nut With Torque Wrench
Page 175

