
TM 5-3810-300-24&P-3
12.6
COLD WEATHER STARTING
When starting an internal combustion engine in cold
temperature is high enough under ordinary operating
weather, a large part of the energy of combustion is
conditions, but at extremely low outside temperatures
absorbed by the pistons, cylinder walls, coolant and in
may not be sufficiently high enough to ignite the fuel
overcoming friction.
injected.
Under extremely low outside temperatures, the cold oil in
To assist in starting an engine under low temperature
conditions, cold weather starting devices are available.
creates very high friction and the effort required to crank
the engine is much greater than when the engine is
NOTE: Starting aids are not intended to
warm.
correct deficiencies such as low battery,
heavy oil, etc. They are for use when other
In a diesel engine, the normal means of igniting the fuel
conditions are normal but the air
sprayed into the combustion chamber is by the heat of
temperature is too low for the heat of
the air compressed in the cylinder. This
compression to ignite the fuel-air mixture.
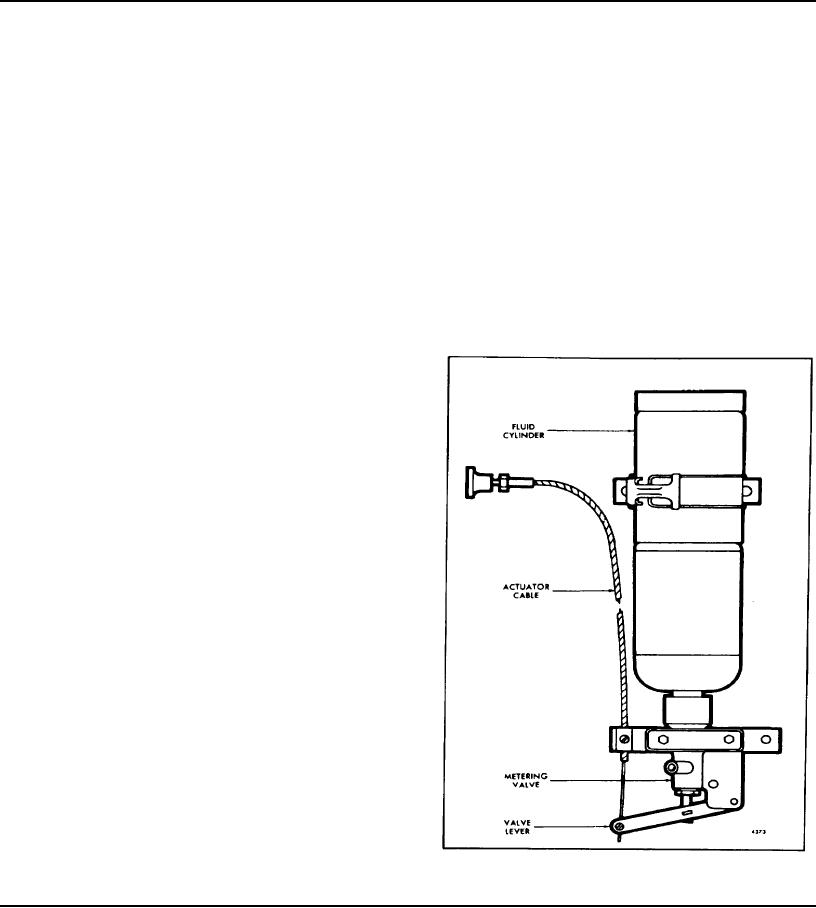
PRESSURIZED CYLINDER STARTING AID
Operation
Start the engine during cold weather, using the "Quick
Start" starting aid system (Fig. I) as follows:
1. Press the engine starter button.
2. Pull out the "Quick Start" knob for one or two
seconds, then release it.
3. Repeat the procedure if the engine does not start
on the first attempt.
CAUTION: Do not crank the engine more than 30
seconds at a time when using an electric starting
motor. Always allow one minute intervals between
cranking attempts to allow the starting motor to cool.
Service
Periodically perform the following service items to assure
good performance:
1. Remove the fluid cylinder and lubricate the valve
around the pusher pin under the gasket with a few drops
of oil.
2.
Lubricate the actuator cable.
3. Actuate the valve with the cable to distribute the oil
on the cable and allow the oil to run down through the
valve.
4. Remove any dirt from the orifice by removing the
air inlet housing fitting, the orifice block and the
screen. Then blow air through the orifice end only.
Fig. 1. - "Quick Start" Assembly
Page 354