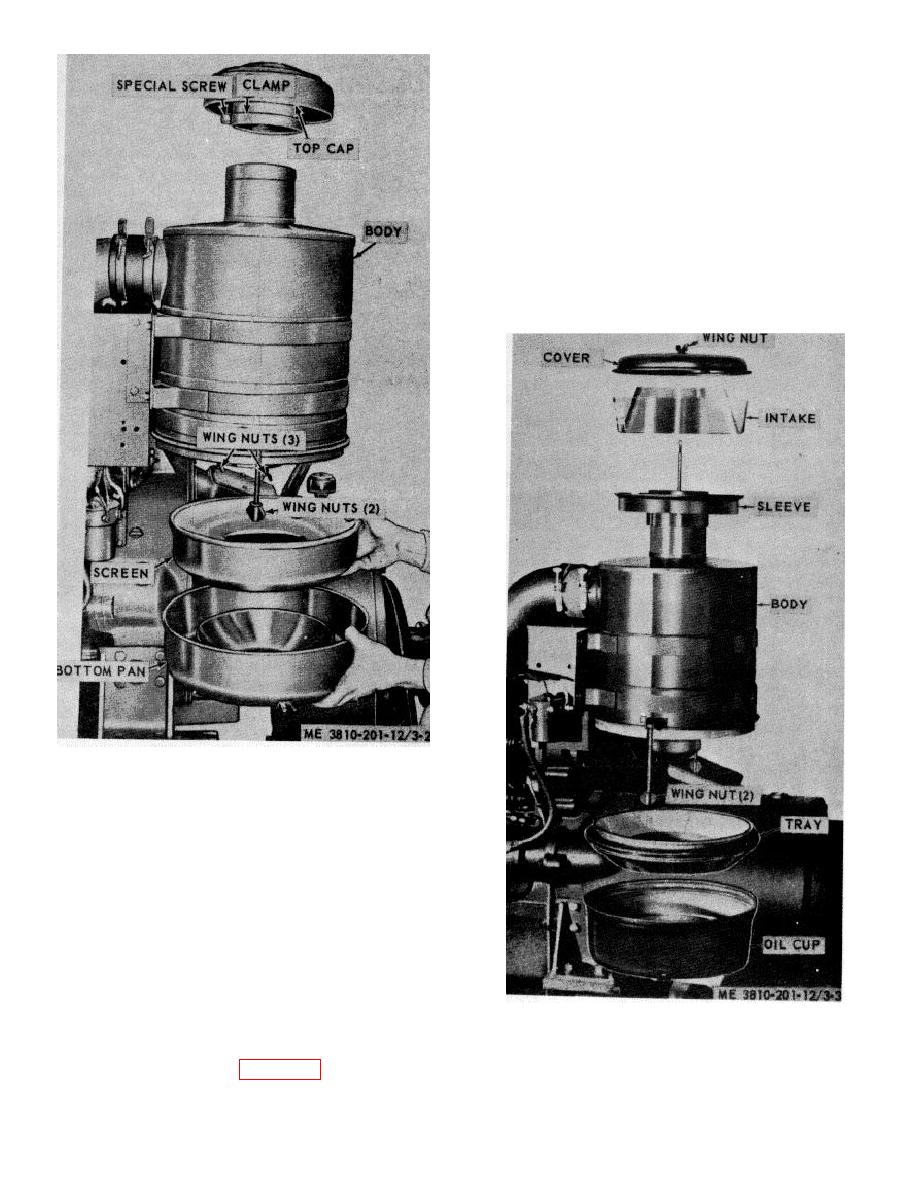
intake body from sleeve; empty dust, then wipe clean
with a clean rag.
(b) Loosen two wingnuts that secures oil
cup to body; empty old oil; remove tray from body by
pressing down on edges, then remove packings.
(c) Clean all parts with an approved
cleaning solvent and dry thoroughly.
(d) Install intake body on sleeve; install
cover on body, and secure with wing nut.
(e) Position one packing and tray on air
cleaner body and press in place.
(f) Refer to LO 5-3810-201-12 for type
and quantity then fill cup with oil.
(g) Position packing and oil cup over tray,
then tighten the two wing nuts.
Figure 3-2. Air cleaner service (crane-shovel model
855BG2).'
(c) Remove three wing nuts that secures
screen to body, then remove screen.
(d) Clean all parts in an approved
cleaning solvent and dry thoroughly.
(e) Install screen on body and secure with
three wing nuts.
(f) Refer to LO 53810-201-12 for type
and quantity required, then fill bottom pan with oil.
(g) Install bottom pan over screen, then
tighten the two wing nuts.
(h) Install top cap on body and secure by
tightening special screw in holddown clamp.
Figure 3-3. Air cleaner service (model 855BG)
(2) Service for crane-shovel model 855BGS
(engine 687C-18-ES).
(engine 687C-18-ES) .
nut; remove cover from air cleaner intake; remove
3-16


