
SECTION II
CONTROLS AND OPERATION
standard hand signals illustrated to ensure coop-
NOTE
eration and teamwork.
Connect the left lead, plate first (the left plate
boom pin is solid).
ATTACHING THE LEADS USING A LATTICE
BOOM
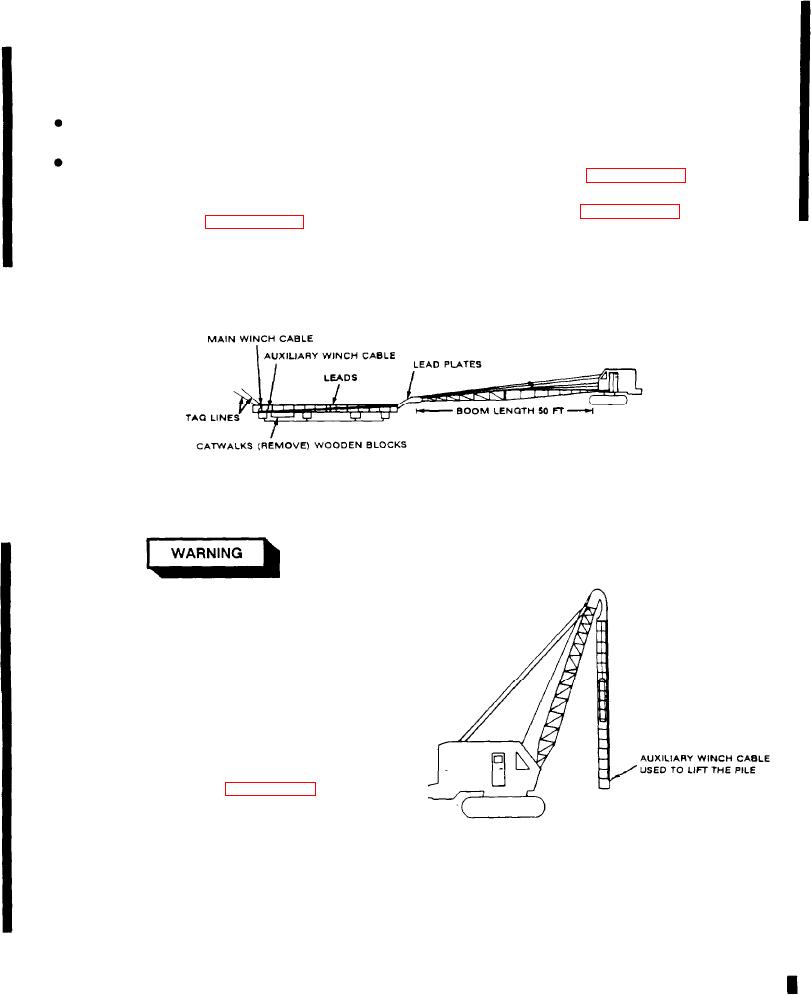
2. Move the crane into position, connect the leads
to the boom with the lead plates (see figure
NOTE
2-11.1). Remove the catwalk.
Tire pressure for P&H crane should only be
3. Run the main and auxiliary winch cable to the
85 psi.
bottom of the leads. Lay the hook blocks on the
Tire pressure for Grove crane should only
back of the leads (see figure 2-11.1). Attach the
be 100 psi (front) and 75 psi (rear).
tag lines (rope) approximately 2 ft. from the bot-
1. Position the crane at the top of the leads, one
tom of the leads (see figure 2-11.1).
boom length away (see figure 2-11.1). Lower the
boom to approximately 3 ft. from the top of the
leads.
Figure 2-11.1. Connect Leads
In high winds (15 or 20 mph) do not move
the crane with the leads raised. Move the
crane at speeds of 2 to 3 mph when the
leads are raised. Use front and rear ground
guides when moving the crane. Move on a
flat, solid surface. Raise the outriggers (if
equipped) before moving the crane.
4. Keeping the boom cables tight at all times,
slowly raise the boom and move the crane toward
the lead section, raising the leads until they are
vertical to the ground (see figure 2-11.2). One per-
son will hold each tag line while raising the leads.
5. Hold the tag lines and raise the leads 2 to 3 in.
Raise the outriggers. Move the crane to the ham-
Figure 2-11.2. Raising Leads
mer, set the leads on the ground (lower
outriggers), disconnect the tag lines and recon-
nect the tag lines to the hammer. Remove the lead
angle guides from the hammer.
TA5015641
Change 1