TM 10-3950-206-12
d. Cleaning, Inspection and Repair.
4-27. Batteries and Cables
(1) Soak all parts of the distributor assembly
a. Removal.
(except condenser, breaker point assembly, and lead) in
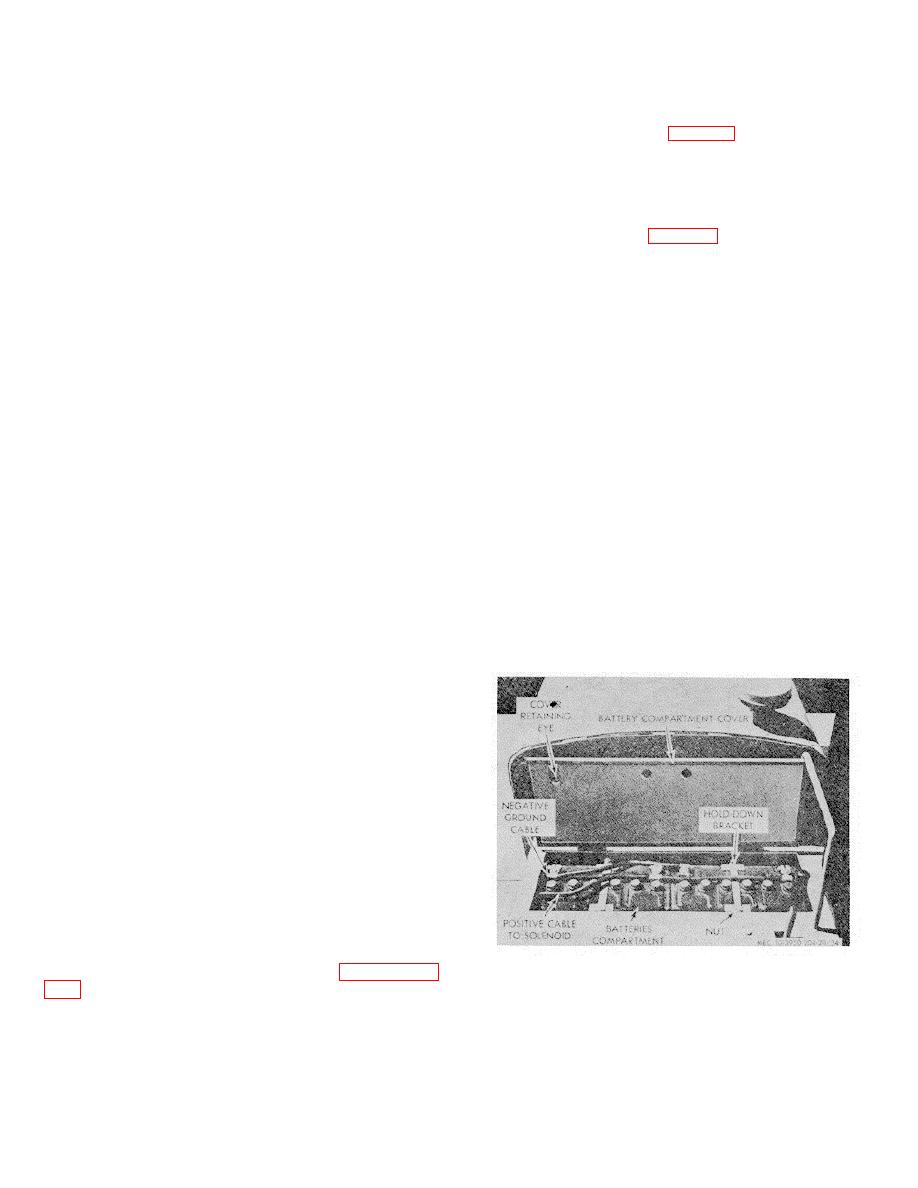
(1) Loosen nuts (fig. 4-12) that secure cables
a mild cleaning solvent or mineral spirits. DO NOT USE
to battery posts; remove cables from posts.
A HARSH CLEANING SOLUTION. Wipe all parts that
(2) Remove hex head capscrew and washer
can not be immersed in a solvent with a dry, clean, lint
that secure ground cable to transmission bell housing.
free cloth. After foreign deposits have been loosened by
Remove cable.
soaking, scrub the parts with a soft bristle brush. DO
(3) Remove nut and lockwasher that secure
NOT USE A WIRE BRUSH, FILE OR OTHER
positive battery cable (fig. 4-12) to starter solenoid;
ABRASIVE OBJECTS. Dry all parts with compressed
remove cable.
air.
(4) Remove nuts, lockwashers, and plain
(2) Inspect the cam lobes for scoring and signs
washer that secure battery clamps to studs; re- move
of wear. If any lobe is scored or worn, re- place the cam
battery camps.
and weights.
(5) Remove batteries from tray.
(3) Inspect the breaker plate assembly for
b. Cleaning and Inspection.
signs of distortion or other defects. Replace if any
(1) Clean cables with a cloth dampened in an
defects are found.
approved cleaning solvent. Clean cable clamps and lugs
(4) The breaker point assembly and con-
with a wire brush.
denser should be replaced whenever the distributor is
(2) Inspect cables for damaged insulation,
overhauled.
breaks, or other damage.
(5) Inspect cap and rotor for chips, cracks,
(3) Inspect cable clamps and lugs for
carbon, carbon runners, corroded terminals or burnt
corrosion, distortion, poor connections to cables, or other
inserts. Replace cap and rotor if found defective.
damage.
(6) Replace housing if cracks, chips, breaks or
(4) Replace cables if defective.
any other visual damage is noted.
(5) Clean battery trays and clamps by flush-
(7) Inspect hardware and threaded openings
ing with a solution of baking soda. Flush parts until
for damaged threads. Chase damaged threads with the
bubbling stops when new solution is applied.
correct size tap or die and replace all damaged hardware
(6) Inspect batteries for loose posts, cracks,
as necessary.
evidence of leaks, or other damage.
e. Reassembly. Reassemble the distributor in
(7) Test battery as directed in c below.
reverse of the disassembly procedure as outlined in c
c. Testing.
above.
(1) Test the specific gravity of each cell with a
f. Installation. Install the distributor assembly in
hydrometer. With ambient temperature of
reverse of the removal instruction as outlined in b above.
g. Contact Point Adjustment.
(1) Remove distributor cap, rotor, and cover. It
is not necessary to remove spark plug wires from
distributor.
(2) If contact points are pitted or rough, dress
them by using a fine ignition file. Remove only the worst
of the roughness.
Do not attempt to remove all
roughness or to dress points until smooth.
(3) Using starting motor, rotate engine until
contact point cam follower is at a high spot on cam.
(points are spread as far as possible).
(4) Using a wire feeler gauge, check gap
between points. If point gap is not 0.020 inch, loosen
lock screw and with proper size screw driver in adjusting
slot, move plate until proper adjustment is obtained.
Tighten lock screw.
(5) Install cover, rotor and cap.
(6) Check ignition timing, refer to paragraph 4-
Figure 4-12. Batteries and cables, installed view.
4-20


