3-70. Air Manifold (Blower-to-Blower) Engine Model
687C-18-ES
a. Removal.
(1)Remove two hose clamps (fig. 3-56) from hose.
(2)Remove eight capscrew, lockwasher, and
flatwasher, then remove blower-to-blower air manifold
and gaskets from blower adapters.
b. Cleaning, Inspection, and Repair.
(1)Clean all parts with an approved cleaning solvent
and dry thoroughly.
(2)Visually inspect all parts for bends, cracks, other
damage or defects.
(3)Repair by straightening bends, welding cracks, or
replacing damaged gaskets, defective manifold or
mounting hardware.
c. Installation.
Install by reversing procedure
described in a above.
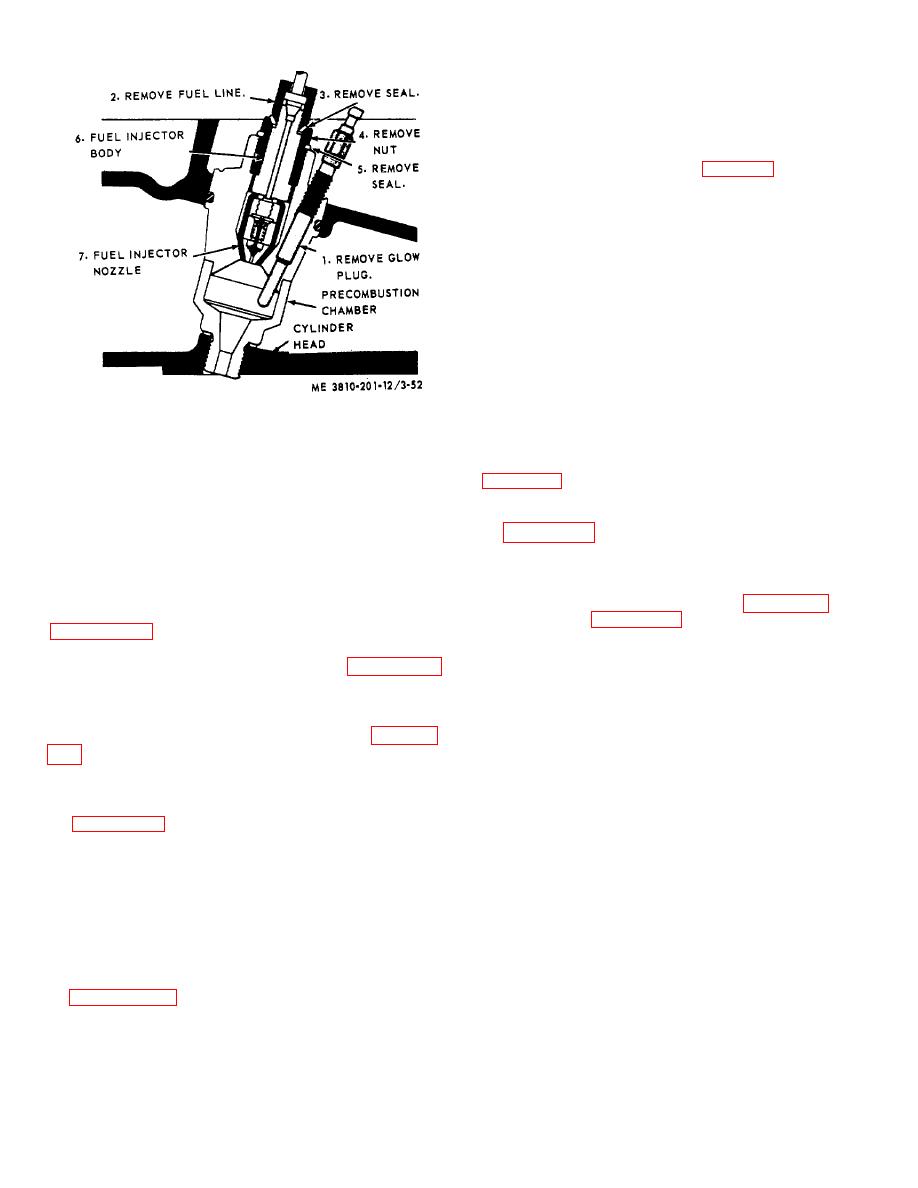
Figure 3-52. Fuel injector, fuel line and glow plug,
removal and installation.
3-71. Fuel Tanks, Lines, and Fittings
a. Removal and Installation.
mounting bracket from engine. Install in reverse
(1)On crane model 855BG2 (winterized). Refer to
order.
(4)Cleaning, inspection, and repair.
Install in reverse order.
(a)Clean all parts with an approved cleaning solvent
(2)On crane model 855BG2 (non-winterized). Refer
and dry thoroughly.
to figure 3-57 and remove in similar manner, except
(b)Visually inspect all parts for breaks, bends,
remove fuel level gage, not fuel level transmitter. Install
cracks, stripped threads, of deterioration of packings.
in reverse order.
(c)Repair by replacing defective hardware,
(3)On crane model 858BG3 (non-winterized).
deteriorated packings or a damaged air cleaner.
(b)Remove fuel lines and breather (para 3-78).
(5)Service.
Service air cleaner as directed in
(c)Refer to figure 3-57 and remove fuel tank in
similar manner, except fuel level gage, removed in (a)
c. Used by Engine D3SSTA on all Model Cranes.
above,
(1)Removal and installation. Refer to figure 3-55,
(d)Install In reverse order.
remove items 1 through 8 in numerical sequence, then
b. Cleaning and inspection.
remove air cleaner from support bracket and
(1)Clean all parts with an approved cleaning solvent
turbocharger coupling. Install in reverse order.
and dry thoroughly.
(2)Disassembly and reassembly. Refer to figure 3-
(2)Visually inspect all parts for cracks, breaks, or
other damage. Inspect hardware for stripped threads or
through 10 in numerical sequence.
other defect. Inspect fuel strainers for breaks, tears of
Reassemble in reverse order.
screen, or other damage. Inspect fuel tank for leaks.
(3)Support bracket removal and installation. Refer
Replace defective components or mounting hardware.
to figure 3-55, remove items 11 and 12, then remove
(3)Repair cracks and breaks by welding. Repair a
support bracket from engine. Install in reverse order.
leaking tank as follows:
(4)Cleaning, inspection, and repair.
(a)Remove fuel tank (1), (2), or (8) in a above.
(a)Clean all parts with an approved cleaning solvent
(b)Fill tank with water to avoid concentration of
and dry thoroughly. Dry filter element with low pressure
fumes.
compressed air.
(c)Weld leaking area.
(b)Visually inspect all parts for damage, defect, or
(d)Drain water from tank, blow dry as possible with
compressed
air,
then
pour
about
(c)Repair by replacing damaged or defective parts.
(5)Service. Service dry type air cleaner as directed
3-64


