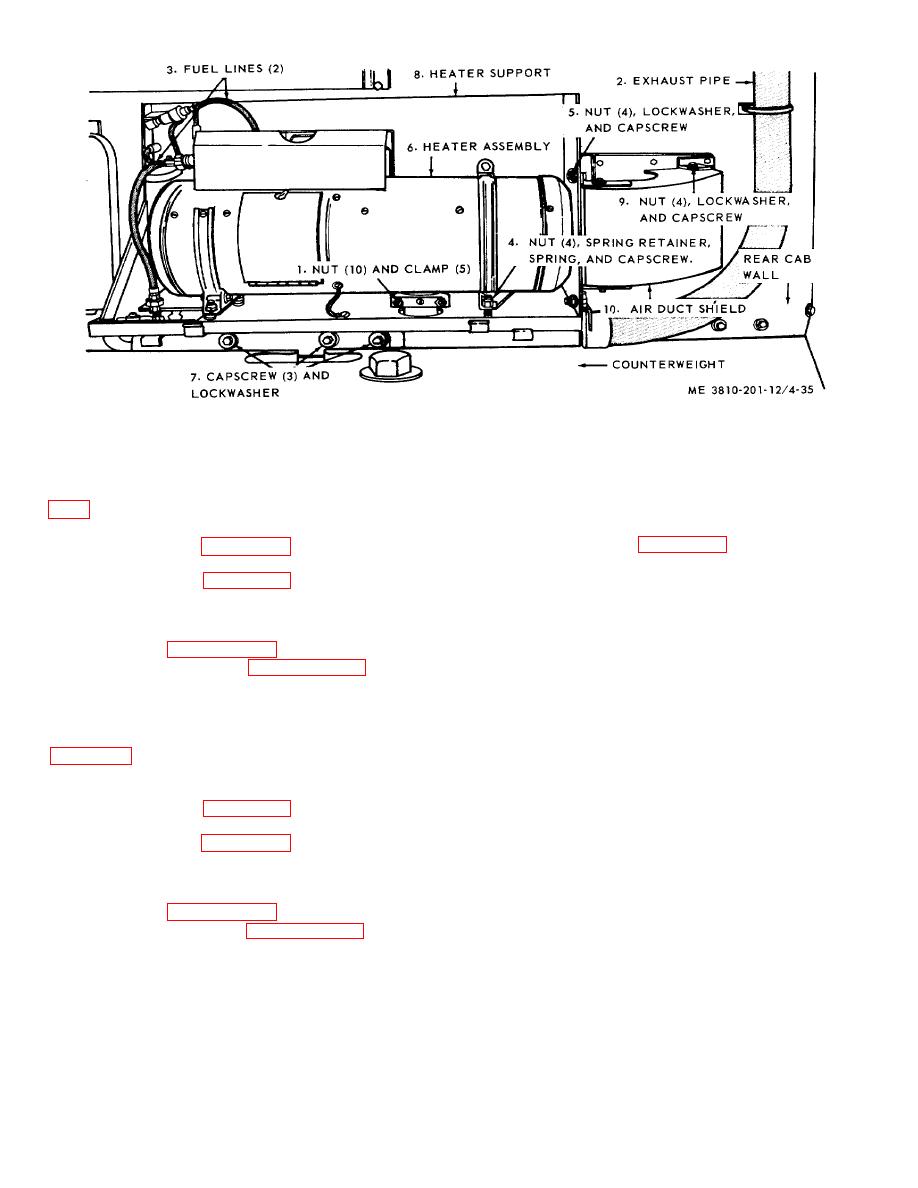
Figure 4-35. Personnel heater removal and installation.
a. Removal and Installation.
4-44. Engine Heater
(1) Tag and disconnect electrical leads from
a. Removal and Installation. Refer to view A figure
all fuel pumps, and cutoff fuel flow by closing shutoff
valves.
b. Disassembly and Reassembly.
(2) Refer to figure 4-41, position container
(1) Refer to figure 4-36 and disassemble the
under drain plug, remove items 1, 2, and 3 and drain
engine heater. Reassemble in reverse order.
heater fuel tank.
(2) Refer to figure 4-37 and disassemble the
(3) Remove remaining items in numerical
engine heater control. Reassemble in reverse order.
sequence.
c. Cleaning. Inspection, and Repair.
Clean,
(4) Install in reverse order.
inspect, and repair engine heater in manner similar to
Note. Individual items of the group may be
that described in paragraph 4-43 above.
removed and installed separately. Never remove
operating instructions.
any item except when necessary to remove
defective components.
4-45. Battery heater
b. Cleaning, Inspection, and Repair.
a. Removal and Installation. Refer to view B of
(1) Clean all removed parts in an approved
cleaning solvent and dry thoroughly.
(2) Visually inspect removed hardware for
order.
wear, burs, or stripped threads. Inspect other removed
b. Disassembly and Reassembly
components for damage or defect. Inspect fuel tank for
(1) Refer to figure 4-39 and disassemble the
cracks, leaks, or other defect.
battery heater. Reassemble in reverse order.
(3) Repair by replacing defective tank
(2) refer to figure 4-40 and disassemble the
strainer, cap, fuel strainer, fuel line, fitting or mounting
battery heater control. Reassemble in reverse order.
hardware. Weld cracks or leaks in fuel tank.
c. Cleaning, Inspection, and Repair.
Clean,
Warning: Fill, tank with water before
inspect, and repair battery heater in manner similar to
that described in paragraph 4-43 above.
welding to void tank of gasoline fumes, and avoid
injury by explosion.
operating instructions.
c. Service.
Services to heater fuel tank, heater
4-46. Heater Fuel Tank, Fuel Pumps, Tank and Fuel
Strainer Group
4-35


