DETROIT DIESEL 53
Connecting Rod 1.6.1
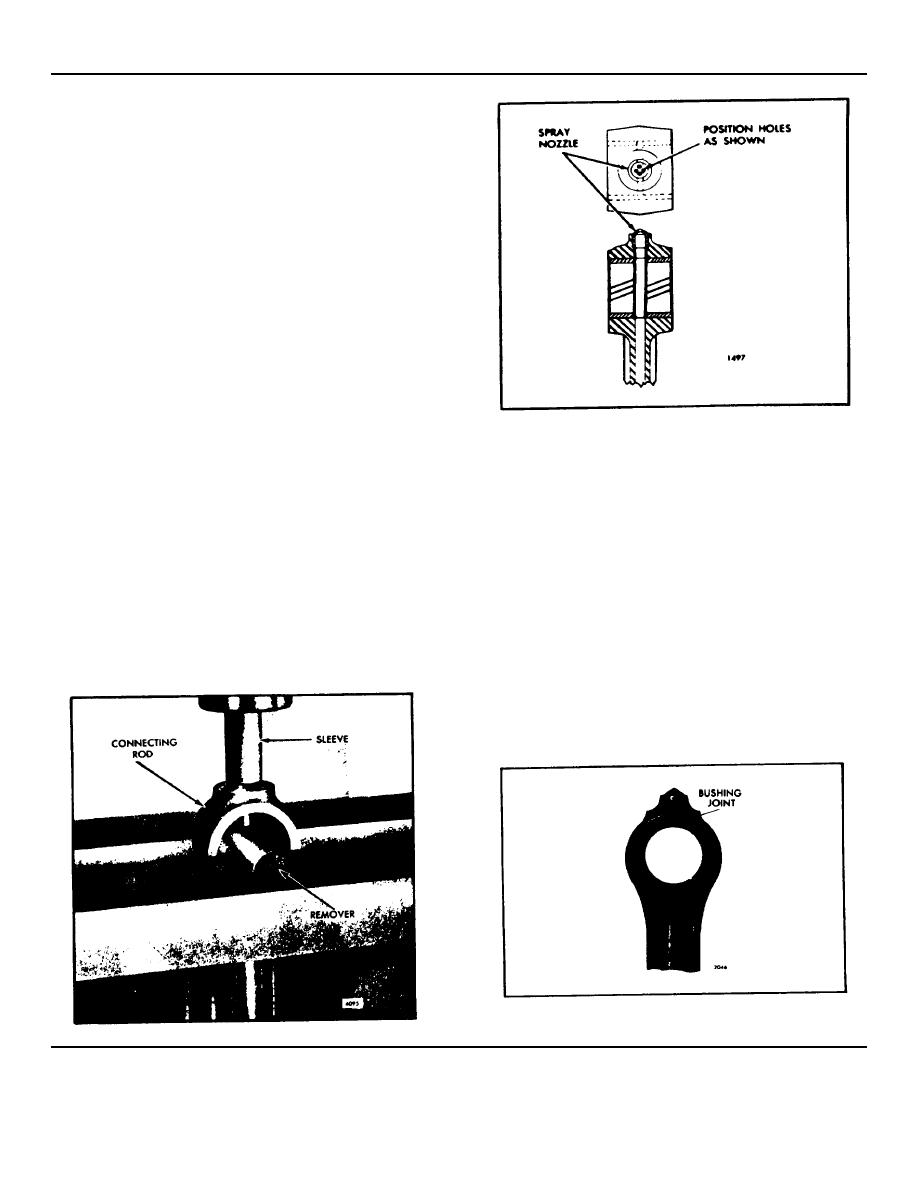
2. Place the connecting rod, spray nozzle remover J
8995 and a short sleeve in an arbor press as shown in
Fig. 5.
NOTE: The orifice in the lower end of
the drilled passage in the connecting
rod is not serviced separately, and it
is not necessary to remove it when
replacing the spray nozzle.
3. Press the spray nozzle out of the connecting rod.
Install a new spray nozzle in the connecting rod as
follows:
1. Start the spray nozzle, with the holes positioned as
shown in Fig. 6, straight into the counterbore in the top
of the connecting rod.
Fig. 6. - Location of Spray Nozzle in Connecting Rod
2. Support the connecting rod in an arbor press. Then,
place a short, 3/8" I.D. sleeve on top of the spray
NOTE: When installing a bushing in
nozzle and under the ram of the press.
the connecting rod, locate the joint
at the top of the connecting rod
3. Press the spray nozzle into the connecting rod until it
(Fig. 7).
bottoms in the counterbore.
3. Insert installer J 4972-2 in the bushing, then insert
Install Bushings in Connecting Rod
handle J 1513-2 in the installer and drive the bushing
into the connecting rod until the flange of the installer
1. Clamp the upper end of the connecting rod assembly
bottoms on the connecting rod (Fig. 4).
in holder J 7632 so that the bore for the bushings aligns
with the hole in the base of the tool.
4. Turn the connecting rod over in the holder and install
the second bushing in the same manner.
2. Start a new bushing straight into the bore of the
connecting rod.
Roam Bushings in Connecting Rod
The bushings must be finished reamed after being
installed in the connecting rod. Refer to Fig. 8 and
ream the bushings as follows:
Fig. 7. Location of Joint in Piston Pin Bushings
Fig. 5. - Removing Spray Nozzle from Connecting Rod
1970 General Motors Corp.
July, 1970
SEC. 1.6.1 Page 3


