
PROPEL TRANSMISSION
SUBSECTION 9B
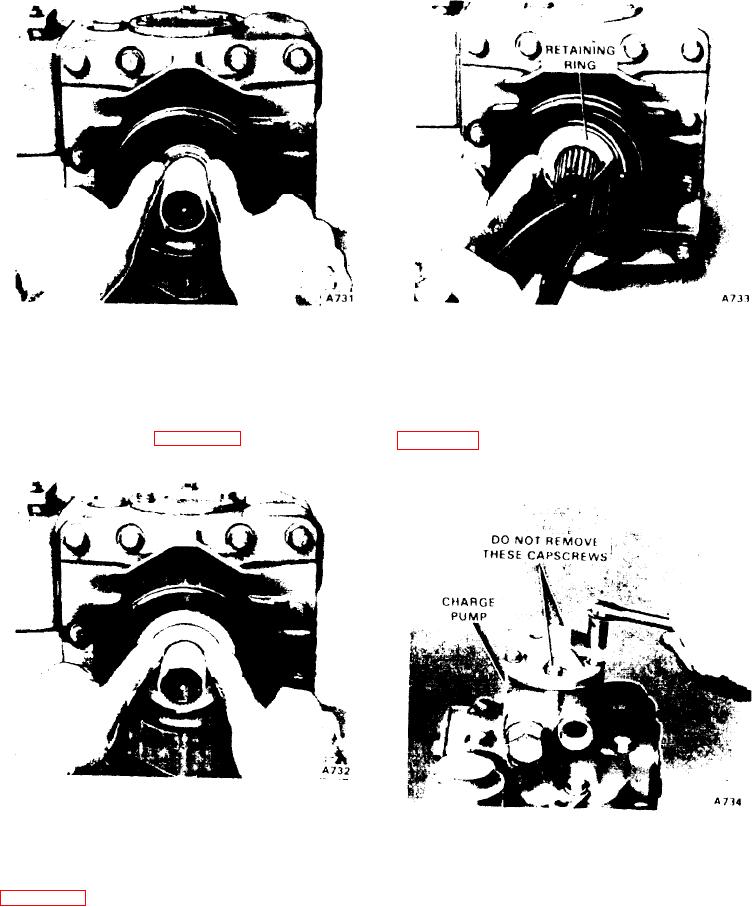
Figure 9B-17. Retaining Ring lnstallation
Figure 9B-15. Installing Bronze Ring
8. Install the large O-ring on the O.D. of the housing then
1. Before removing the charge pump, mark its housing and
slide the housing into place against the bronze sealing ring.
the main pump housing to insure proper orientation when
Since this is a spring loaded assembly, it may be necessary
reassembling. Loosen the four capscrews forming a
to push against the aluminum housing to expose the re-
rectangular pattern on the rear of the charge pump(see Fig-
taining ring groove (see Figure 9B-16).
ure 9B-18). Do not remove the screws at the top and bot-
tom as these hold the charge pump together. Lift the charge
pump straight off of the main pump.
Figure 9B-16. Installing Aluminum Housing
Figure 9B-18. Charge Pump Removal
9. Install the retaining ring with the beveled side out,
putting the side opposite the tang into the pump groove first.
Check that the ring has snapped into place completely (see
2. Remove and discard the gasket between the charge
pump and main pump.
CHARGE PUMP, RELIEF VALVE, AND CHECK VALVE RE-
3. The charge relief valve can be inspected by removing the
PLACEMENT. To remove the charge pump, charge pump re-
plug, spring, and poppet. If any shims fall out of the plug be
lief valve, and check valves, proceed as follows:
sure to reinstall them.
9B-11