Section IV. OPERATOR'S MAINTENANCE
3-7. General
This section contains information necessary for
operator/crew maintenance of the crane-shovel, as
authorized by the maintenance allocation chart.
3-8. Engine Inspection and Service
a. Inspection. Visually inspect engine compartment
for cleanliness. Investigate all accumulations of oil, dirt,
or dust, to assure that no lubricant or coolant leakage
exists.
Assure that all external lines, fittings, or
accessories are securely mounted and that no hardware
or accessory is missing.
Report all defects to
organizational maintenance.
b. Service.
(1) Refer to current lubrication order LO 5-
3810-206-12 for interval and type of lubricant to service
engine crankcase.
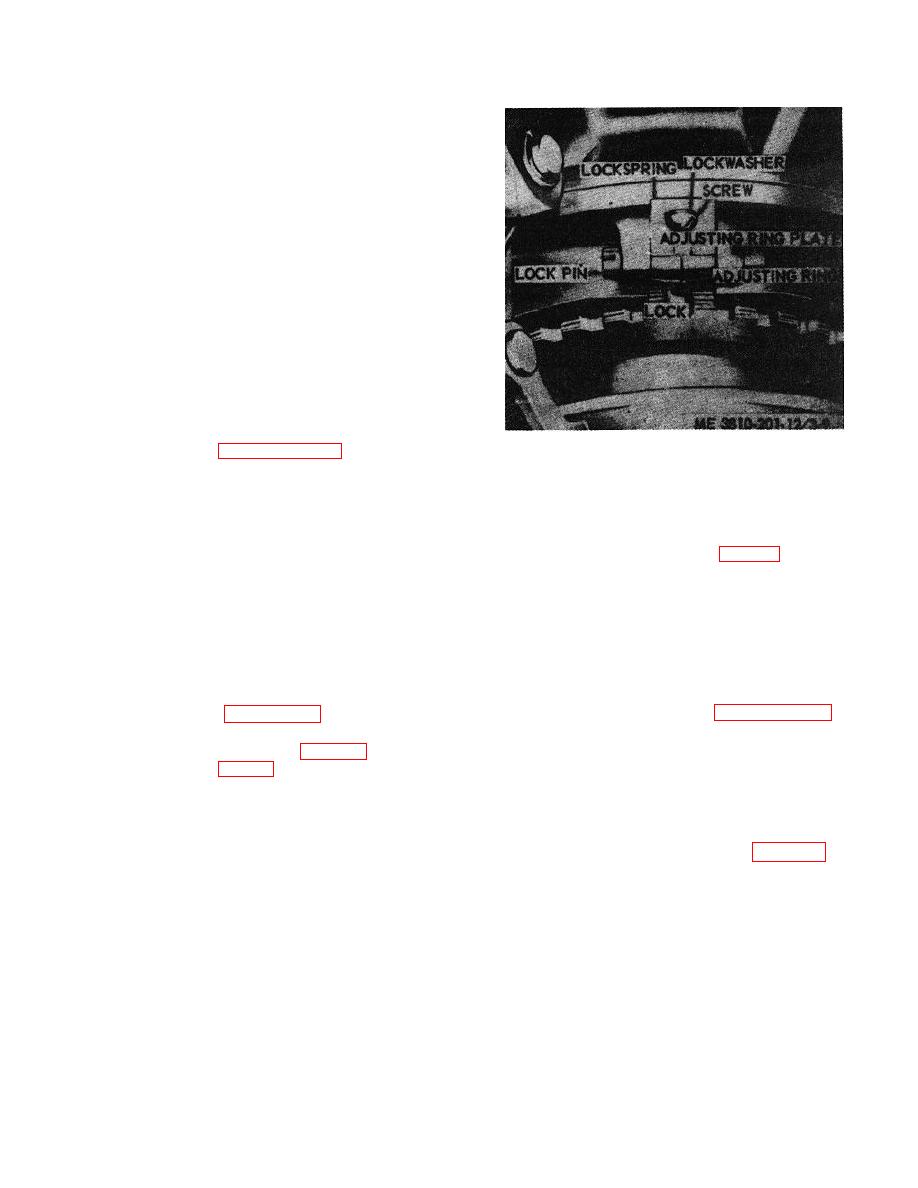
Figure 3-8. Engine clutch adjustment.
(2) Refer to paragraph 3-4 for service
instructions on oil filters, air cleaner, or oil strainer.
(7) When adjustment is correct, lock
adjusting ring by turning pin 1/4 turn clockwise.
3-9. Engine Clutch Adjustment
(8) Position lock spring in the adjusting ring
and secure with lockwasher and screw.
a. General. The engine clutch, when engaged,
(9) Position cover plate (fig. 3-7) on housing
transfers power from engine to power take-off output
and secure with two lockwashers and capscrews.
shaft which actuates the operating mechanisms. A drive
chain connects engine drive sprocket. Clutch control is
3-10. Engine Oil Filter Service
through adjustable linkage from lever at operator's
station to power takeoff. The clutch is in need of
Refer to paragraph 384f and service engine oil filters.
adjustment when it will not pull the load; it gets hot, or
clutch control lever jumps out of the engaged position.
3-11. Engine Air Cleaner Service
b. Adjusting the Engine Clutch.
(1) Refer to figure 3-7, remove two
service oil bath type engine air cleaners.
capscrews, lockwashers, and cover plate from housing.
(2) Disengage the clutch (para 2-8) and turn
b. Dry Type. The rear mounted dry type engine air
pressure plate until lock (fig. 3-8) is up.
cleaner, used on engines model D333TA, contains a
(3) Remove screw, lockwasher, and lock
replaceable filter element which can be removed for
spring from the adjusting ring.
cleaning by compressed air, or by washing. Service as
(4) Unlock the adjusting ring by turning
follows:
lockpin 14 turn counterclockwise.
(1) Loosen two wing nuts (fig. 3-9) and
(5) Turn the adjusting ring clockwise to
remove cover from air cleaner.
tighten clutch, counterclockwise to loosen.
(2) Remove filter element and packing from
(6) Test clutch by engaging clutch control
body.
lever. When the clutch is properly adjusted, a distinct
(3) Loosen screw and remove inlet screen
pressure is required to engage clutch control lever.
from body.
(4) Clean all removed parts in an approved
cleaning solvent and dry thoroughly, then use a damp
cloth to wipe accumulation of dust from body.
3-23


