Section XII. ELECTRICAL SYSTEM
diagram (view B of fig. 1-9).
3-74. General
c.
Organizational Maintenance Procedures.
a.
For Crane Units with Engine Model 687C-18-
This section will outline and illustrate organizational
ES. This 24 volt electrical system consists of two 12
maintenance procedures authorized by the Maintenance
volt batteries connected in series, a belt driven battery-
Allocation Chart (app. C).
lights, generator voltage regulator, trouble light, oil
3-75. Batteries
pressure transmitter, water temperature transmitter, low
oil pressure switch, water high temperature switch, and
a.
Removal and Installation.
ammeter. An over speed governor driven through
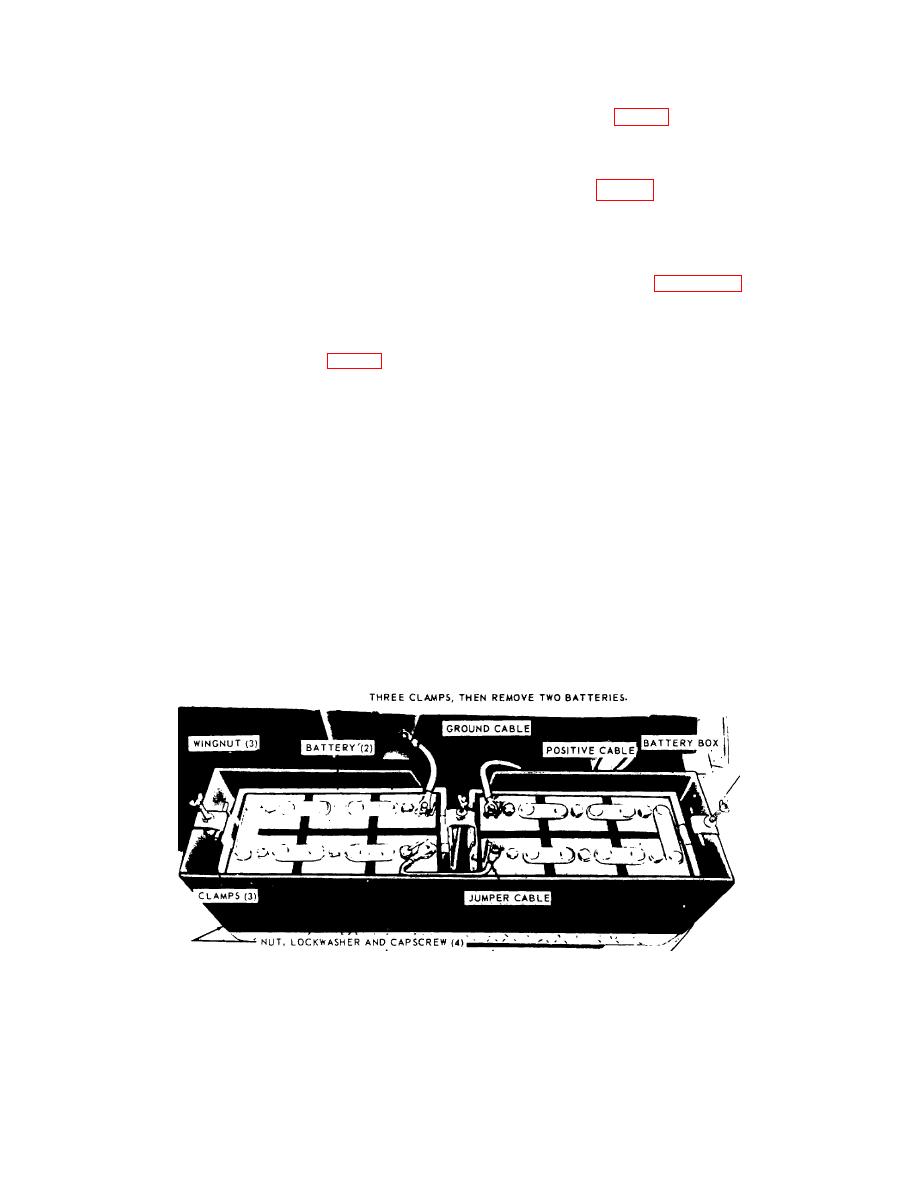
(1) Refer to figure 3-57, perform steps 1
tachometer drive, actuates the shutdown lever on
and 2, and remove batteries.
injection pump through a micro-switch controlled circuit
(2) Install in reverse order.
when engine overspeeds the predetermined limit. The
cranes are also equipped with a horn and floodlight.
b.
Cleaning, Inspection, and Repair.
See wiring schematic diagram (view A of fig. 1-9).
(1) Clean batteries with an approved
b.
For Crane Units with Engine Model D333TA.
cleaning solution and dry thoroughly. Remove all
This unit is equipped with battery-charging alternator
corrosion from battery cables and terminal posts.
and alternator voltage regulator instead of generator and
(2) Visually inspect battery cases and vent
generator voltage regulator. It is not equipped with the
caps for cracks, or terminals for looseness. Use a
micro-switch overspeed governor shutdown circuit, but
hydrometer and test electrolyte for specific gravity.
has a low fuel pressure switch mounted on clean side of
Charge, or replace a battery reading less than 1.250 on
fuel filter that is normally open to prevent electrical
hydrometer.
current from flowing back to the alternator when engine
(3) Repair by replacing defective cables or
is stopped, and cause damage to rectifiers in alternator
battery.
or transistors in regulator.
See wiring schematic
STEP 1
REMOVE THREE WING NUTS, REMOVE COVER (NOT SHOWN).
THEN REMOVE GROUND
CABLE.
STEP 2
REMOVE JUMPER CABLE, POSITIVE CABLE, THREE CLAMPS, THEN REMOVE TWO
BATTERIES.
STEP 3
REMOVE FOUR CAPSCREW, LOCKWASHER AND NUT FROM END BRACKET, THEN REMOVE
BATTERY BOX FROM CAB FLOOR.
ME 3810-201-12/3-68
Figure 3-57. Battery and Battery Box, removal and installation.
3-68


