TM 5-3810-295-34
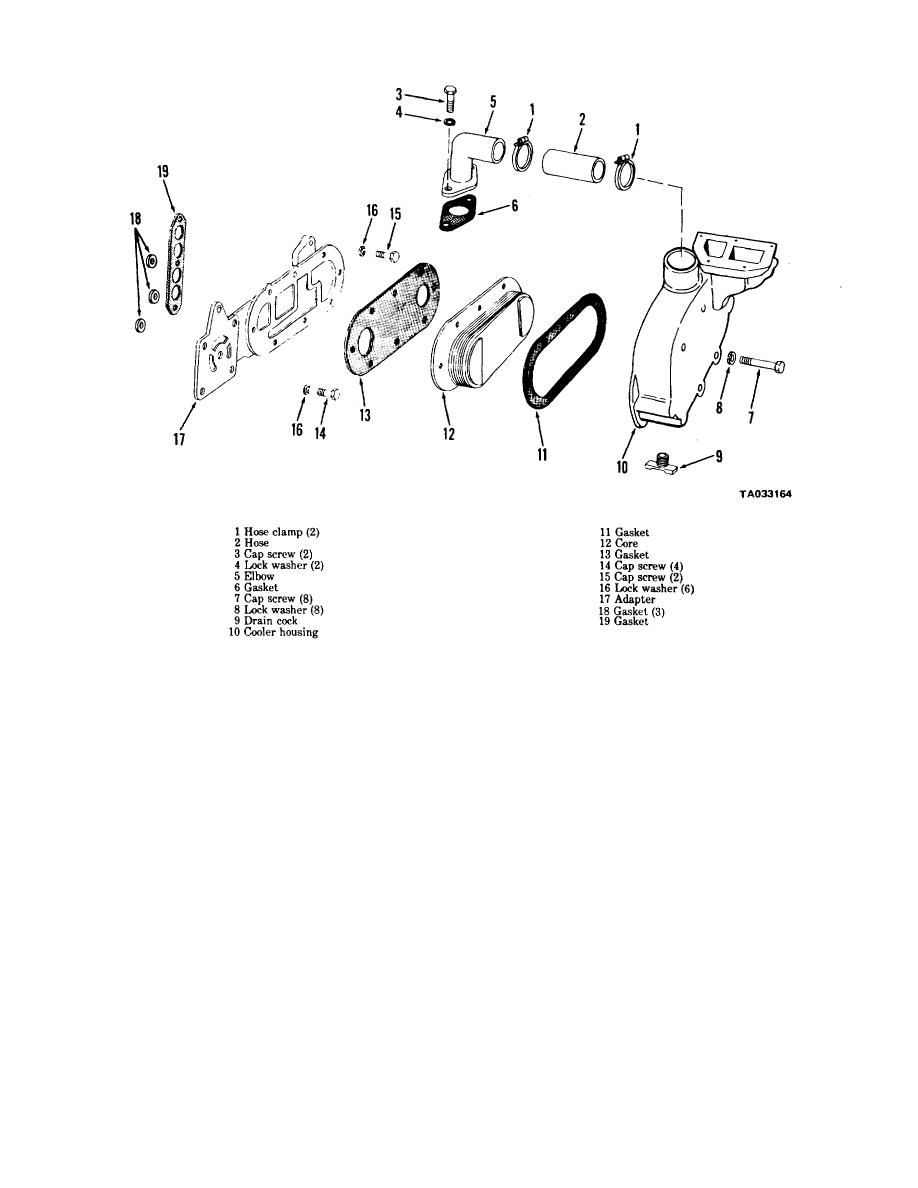
Figure 3-5. Oil cooler assembly-exploded view.
thoroughly with clean, hot water. After cleaning, dip
3-28.
Inspection and Repair
the core in light oil.
a. Remove all traces of gasket material from the
NOTE
cylinder block and the oil cooler components. Replace
Do not attempt to clean an oil cooler core
all gaskets.
when an engine failure occurs in which
b. Circulate cleaning solvent, Federal Specification
metal particles from worn or broken parts
P-D-680, or equivalent, through the core passages with
are released into the lubricating oil. In this
a force pump to remove the carbon and sludge. Clean
case, replace the oil cooler core.
the core immediately, before the sludge hardens. If the
d. Using a suitable plate, attach the
oil passages are badly clogged, circulate an Oakite or
flanged side of the cooler core to the plate, using a
alkaline solution through the core and flush thoroughly
gasket made from rubber to assure a tight sea.
with clean, hot water.
Drill and tap the plate to allow an air hose fitting to
c. Clean water side of the cooler by immersing the
be attached at the inlet side of the core. Apply
core in the following solution: Add one-half pound of
approximately 75--150 psi air pressure while the
oxalic acid to a two and one-half gallon solution com-
core is submerged in a water bath heated to 180F.
posed of one-third muriatic acid and two-thirds water.
Leaks will be indicated by air bubbles in the water.
Cleaning action is evidenced by bubbling and foaming.
If leaks are evident, replace the core.
When the bubbling stops (after 30 to 60 seconds)
e After the pressure check is completed, dry the
remove the core from the cleaning solution and flush it
core with compressed air.
3-11


