TM 5-3810-307-24-1-1
b.
Attach lifting device to radiator (34), place rubber mounts (35) on frame mounting brackets, and lower
radiator (34) and air cooler (39) into carrier while aligning holes for rubber mounts and mounting brackets.
c.
Secure radiator (34) to frame mounting brackets with washers (33), capscrews (32), washers (31), and
locknuts (30).
d.
Apply LOCTITE 242 to threads of capscrews (23), position and align three-piece adapter (26) and cooling
fan (25) to engine, and secure with washers (24) and capscrews (23). Torque capscrews (23) to 32 lbs-ft (43.4
Nm).
e.
Install plate (60) over opening in shroud (44) and secure with capscrews (62), lockwashers (63), and
washers (64).
f.
Install fan guard (21) on shroud (44) with spacers (22), large washers (20), lockwashers (19), and
capscrews (18).
g.
Connect aeration hose (17) to adapter (52) with clamp (16).
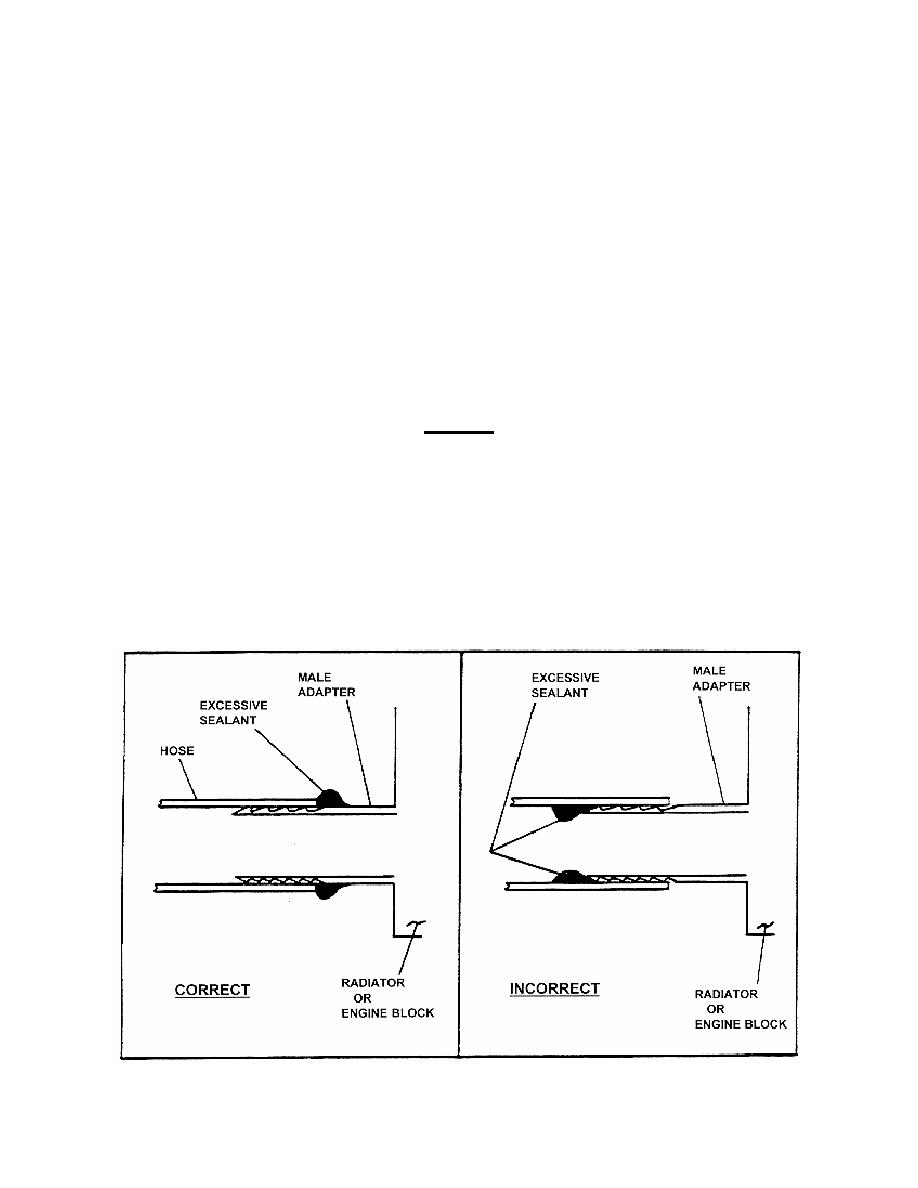
CAUTION
Do not apply sealant to inside of radiator hose and push it onto male adapter.
This can result in excess sealant being pushed ahead of male adapter and
into hose exposing sealant to engine coolant. The coolant can then carry the
excess sealant into the radiator cores and engine water jackets, plug the
coolant passages, and result in premature engine failure.
h.
Apply LOCTITE #518 sealant to male hose adapters, and connect lower radiator hose (15) to engine, and
upper radiator hose (14) to radiator (34) and tighten clamps (13).
Figure 2-2-8. Radiator Hose Sealant Application
2-2-36


