TM 5-3810-307-24-1-2
GENERATOR MOUNTING
WARNING
Failure to disconnect negative cable at
battery before removing or attaching
generator "BAT" terminal lead may result in
an injury. If a tool is shorted at generator
"BAT" terminal, the tool can quickly heat
enough to cause a skin burn.
NOTE
Always re-install fasteners at original
location. If necessary to replace fasteners,
use only correct part number or equivalent.
If correct part number is not available, use
only equal size and strength.
Fasteners that are NOT to be reused will be
noted in procedure.
Fasteners requiring thread locking compound
will be noted in procedure.
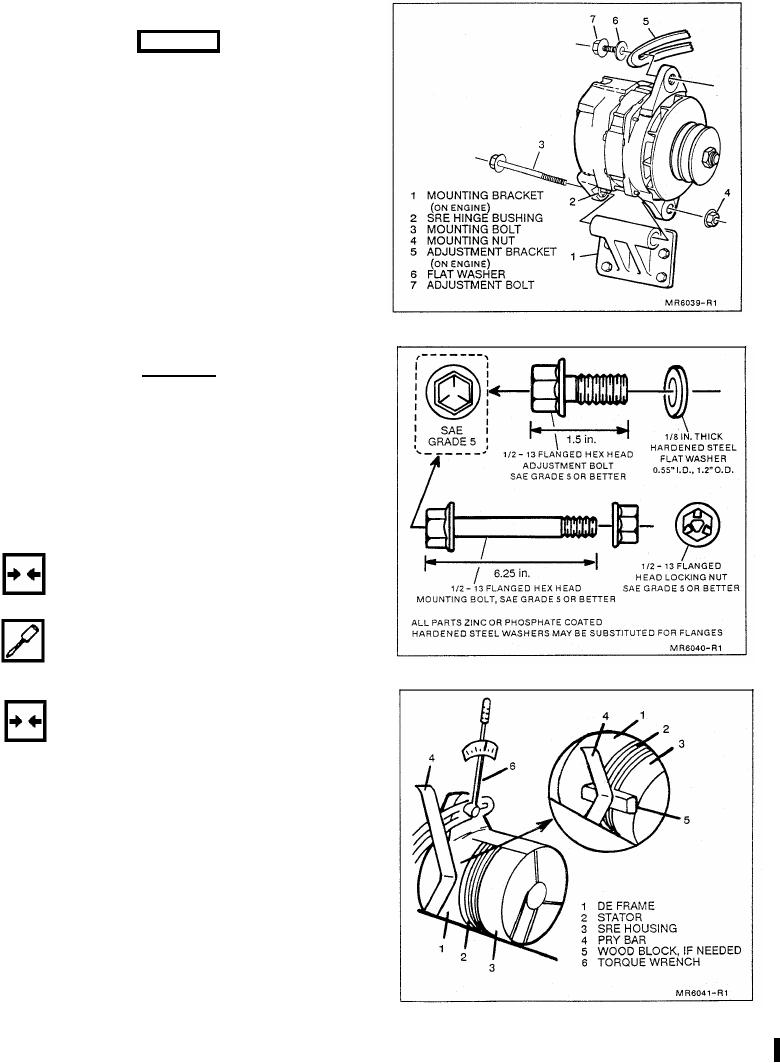
Figure 10. Installing Generator on Engine
Use specified torque values when shown.
CAUTION
Using or replacing fasteners in any other
manner could result in part or system
damage.
Always follow engine manufacturer's instructions
for mounting generator on engine. The following
procedure is typical and may not match all steps
necessary for a particular application.
TEST EQUIPMENT NEEDED:
Belt Tension Gage
Remove or Disconnect
1. Negative cable at battery.
Adjust
2. SRE hinge bushing position so that the
Figure 11. Generator Mounting Bolts
mounting lugs will fit over the bracket spool.
Install or Connect
3. Generator double mounting lugs to mounting
bracket on engine (Fig. 10). Adjust hinge
bushing in mounting lug by tapping endways
until it just clears the spool on the mounting
bracket. Install flanged mounting bolt and
flanged mounting bolt nut. If bolt and/or nut
are not flanged, 1/8" thick hardened steel
washers (part no. 1967343) must be
substituted for flanges (Fig. 11).
4. Generator adjustment lug to adjustment
bracket on engine, with 1/8" thick hardened
steel washer (part no. 1967343) and flanged
adjustment bolt (Fig. 39). Finger tighten.
5. Generator belt to pulley.
6. If engine uses automatic
belt
tensioner
(idler), skip to step 7.
Figure 12. Adjusting Belt Tension

