TM 5-3810-306-20
AIR RESERVOIR REPLACEMENT
TOOLS: General
mechanic’s tool kit: automotive (5180-00-177-7033)
SUPPLIES:
Lockwashers (Item 15, Appendix C)
Lockwashers (Supplied with bracket)
EQUIPMENT CONDITIONS: Crane wheels are chocked.
Air system is purged. (Refer to page 11-2.)
Disconnect ground cable at shunt. (Refer to page 8-109.)
REMOVAL
NOTE
Primary and secondary air reservoirs
are replaced in the same manner.
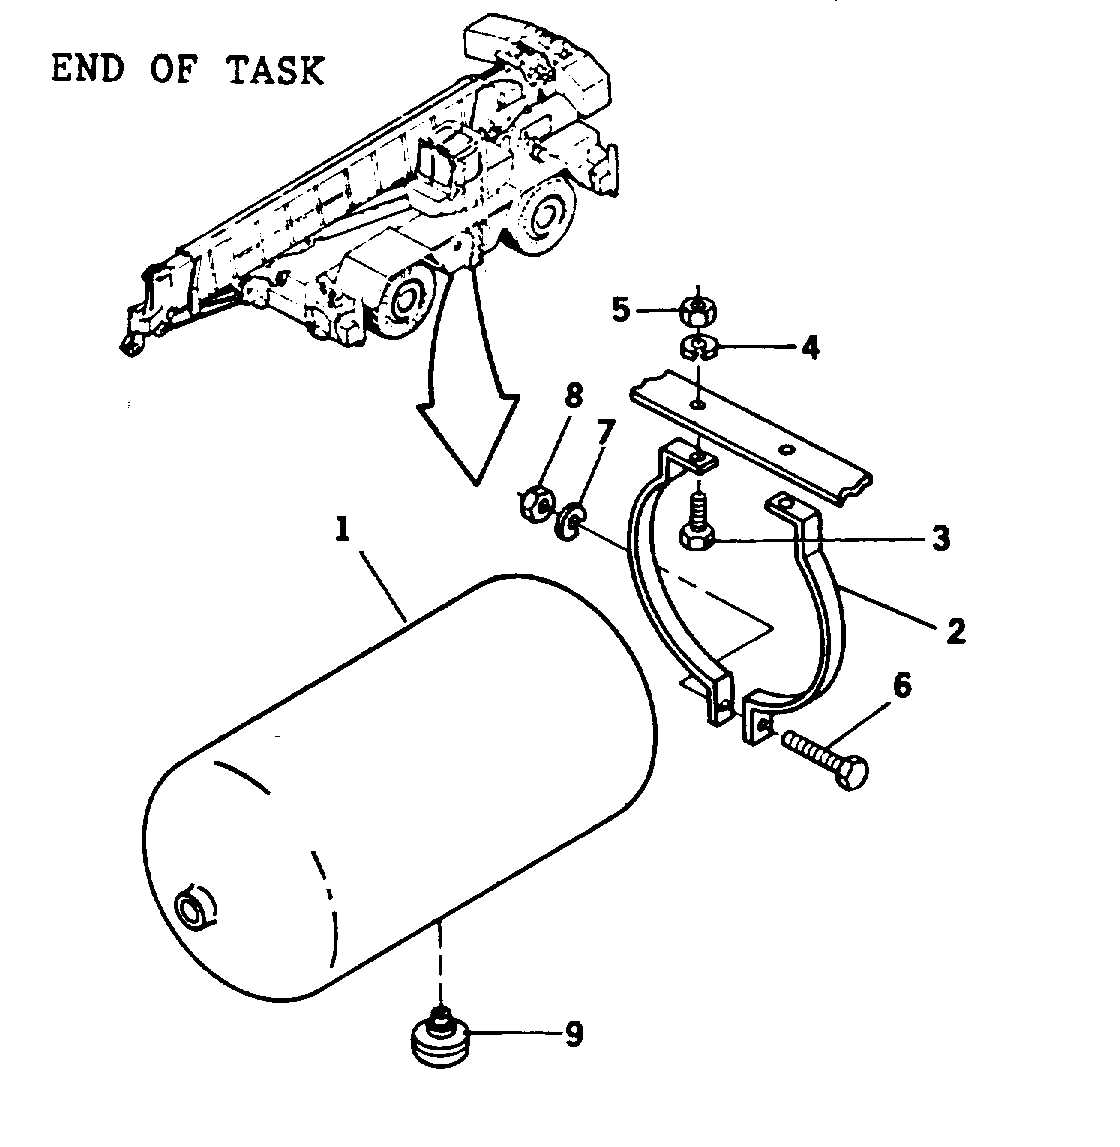
1.
REMOVE AIR RESERVOIR (1).
a.
Tag and disconnect air lines on air reservoir (1).
Plug air lines.
b.
Remove two capscrews (3), lockwashers (4) and
nuts (5) to free air reservoir (1) from chassis
frame. Discard lockwashers.
c.
Remove two long capscrews (6), lockwashers
(7) and nuts (8) from mounting bracket (2).
Discard lockwashers.
d.
Remove inlet, outlet port fittings and automatic
drain valve (9) or petcock drain. Retain for
installation or replace if damaged.
INSTALLATION:
1.
INSTALL AIR RESERVOIR (1).
a.
Install mounting bracket (2) on air reservoir (1).
Secure with two long capscrews (3), new
lockwashers (7) and nuts (8).
b.
Install inlet, and outlet port fittings and
automatic drain valve (9) or petcock drain.
c.
Support air reservoir (1) and align mounting
bracket (2) on chassis frame. Secure with two
capscrews (3), new lockwashers (4) and nuts
(5).
d.
Remove tags, plugs and connect air lines to air
reservoir (1).
2.
CONNECT GROUND CABLE AT SHUNT. (REFER
TO PAGE 8-109.)
3.
START-UP ENGINE AND ALLOW AIR PRESSURE
TO BUILD UP. (REFER TO TM 5-3810-306-10.)
4.
CHECK
ALL
AIR
OPERATED
FUNCTIONS.
(REFER TO TM 5-3810-306-10.).
END OF TASK
11-21