Section XVII. HYDRAULIC SYSTEM
Note.
3-116. General
a. Description. Each hydraulic control lever or foot
Winterized units intended for service
pedal is connected to a master cylinder (compensator).
in temperatures as low as -65' F
Each master cylinder is connected by a hydraulic line to
require boots of special material on
an hydraulic cylinder.
The hydraulic cylinder is
all hydraulic components.
Check
connected to brake, clutch, or other mechanism by
parts manual (TM 5-3810-201-20P) to
mechanical linkage. When the lever or foot pedal is
assure proper boots have been
moved, there is a corresponding movement of the
installed, or to order proper boot
piston in master cylinder, which transmits fluid to
when replacement is required.
hydraulic cylinders, thus actuating brake of clutch.
3-117. Hydraulic Tank (Reservoir)
When pressure is released from pedal lever, springs
a. Removal and Installation.
cause pistons in hydraulic cylinders to return to normal
(1) Close shutoff cocks in two supply lines
position.
beneath tank, tag and disconnect supply lines, then
b. Bleeding the Hydraulic Systems. When air is
plug lines to prevent contamination of hydraulic system.
present in the hydraulic system, controls become
(2) Open tank by removing breather or filler
"spongy" and do not hold brake or clutch firmly as they
plugs, position suitable container to receive fluid, then
should. To remove air from system, proceed as follows:
open shutoff cocks and drain hydraulic fluid from tank.
(1) Fill hydraulic tank with clean hydraulic
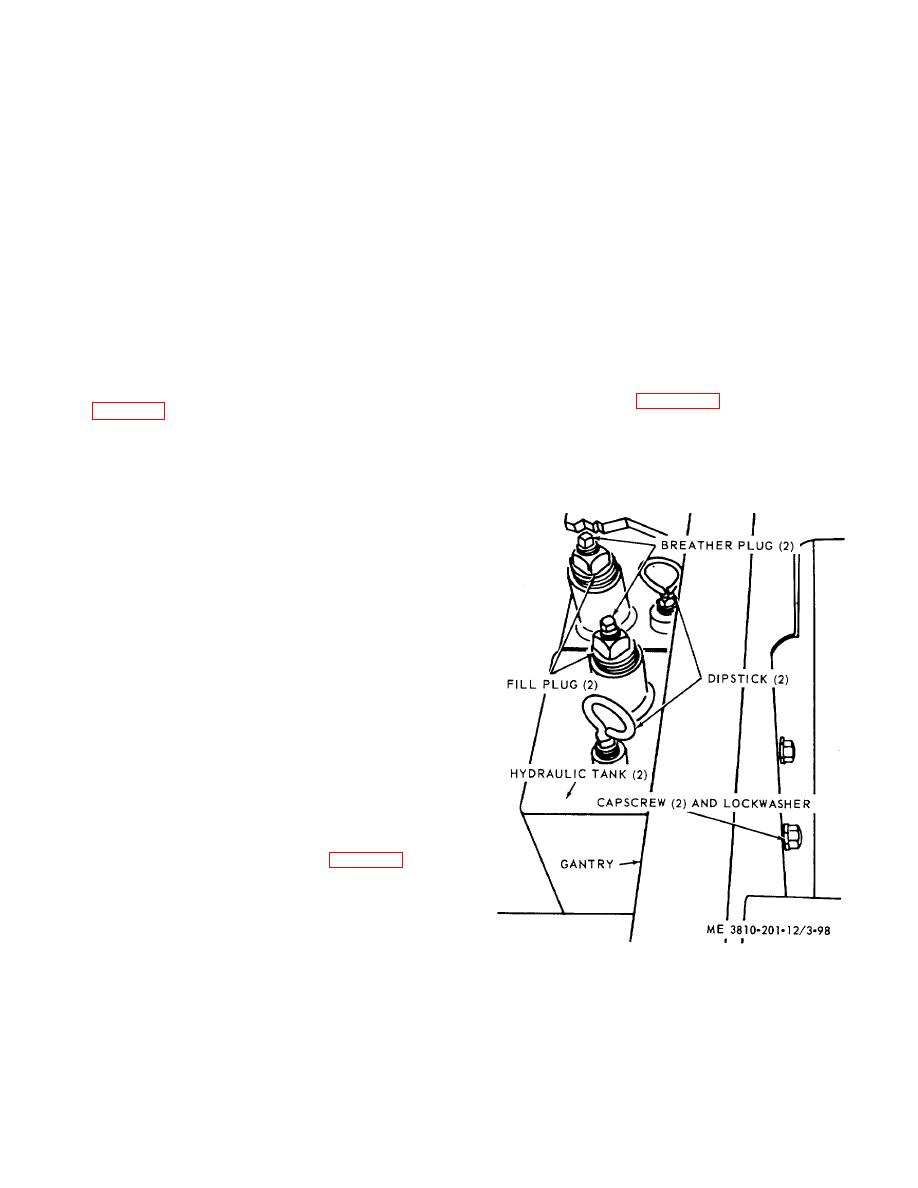
(3) Refer to figure 3-98 and remove hydraulic
fluid (para 3-19 and LO 5-3810-201-12). Check level in
tank.
tank frequently during bleeding operation, to prevent air
b. Cleaning, Inspection, and Repair.
from entering supply line.
(1) Clean all parts in an approved cleaning
(2) Be sure shutoff cock (drain cock) in
solvent and dry thoroughly.
supply line at bottom of tank is open to assure gravity
(2) Visually inspect all parts for dents cracks,
flow of fluid to cylinders, then bleed compensators
or excessive wear.
(cylinders) in lever stand by opening bleeder cap in each
compensator. starting with the lower compensator, and
working upward through the top row.
(3) After bleeding lever stand compensators,
begin bleeding clutch and brake cylinders, starting with
the lowest one then working upward toward cylinders
mounted at highest point.
Attach one end of bleeder hose to bleeder screw then let
opposite hose end rest in jar partially filled with hydraulic
fluid. Always keep this end of hose under fluid
to prevent air from entering bleeder hose and re-
entering the hydraulic system. Open bleeder screw,
apply pressure to appropriate lever or pedal and watch
hose end in jar. When bubbles no longer form in fluid,
close bleeder screw and remove bleeder hose from
screw. Repeat above procedure for each cylinder in
system.
(4) Move each control lever or pedal slowly
and note clutch or brake action. If any of the controls
still feel spongy, repeat bleeding operation.
(5) Fill both hydraulic tanks (para 3-19 and
LO 5-3810-201-12) with clean fluid.
Check level
frequently while bleeding cylinders, then bleed air from
the propel brake cylinders in car body. Reach through
holes in turret just above the tread. The bleed screw for
these cylinders is toward inside of car body. Reach
Figure 3-98. Hydraulic tank, removal and installation.
around the cylinder, install bleeder hose, then open
screw.
Tighten bleeder screw as soon as bubbles no longer
appear in bleeder jar. Repeat procedure on remaining
propel clutch hydraulic cylinder.
3-109


