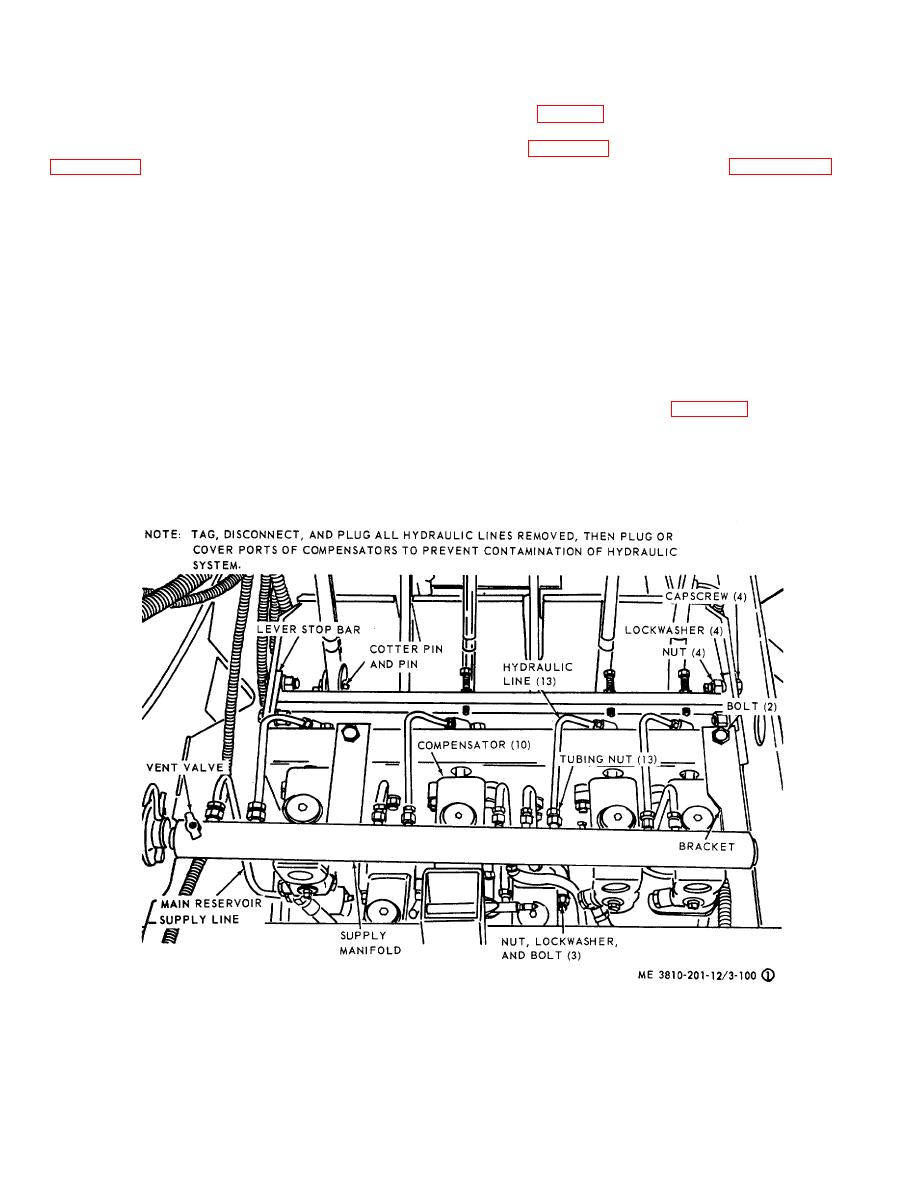
(1) Remove upper and lower cover plates
and fittings for signs of excessive wear or damaged
from lever stand.
condition.
(2) Remove boom hoist hydraulic control
(3) Repair
by
replacing
defective
handle (fig. 2-23) from boom hoist lever, and applicable
components.
(raise and lower) compensator (cylinder) from lever
3-119. Compensators (Cylinders)
stand (para 3-119).
a. Removal and Installation. Refer to sheet 1 of
(3) Refer to sheet 2 of figure 3-100 and
remove boom hoist lever and linkage from lever stand.
in reverse order.
(4) Install in reverse order.
b. Cleaning, Inspection, and Repair-.
c. Cleaning, Inspection and Repair.
(1) Clean all parts with an approved cleaning
(1) Clean all parts in an approved cleaning
solvent and dry thoroughly.
solvent and dry throughly.
(2) Visually inspect compensator for external
(2) Visually inspect all parts for breaks,
damage or excessive wear, burs, or stripped threads on
cracks, deformation, or excessive wear.
Inspect
mounting hardware, or deterioration of boot on push rod.
mounting hardware for burs, or stripped threads.
(3) Repair by replacing damaged hardware,
(3) Repair by replacing defective parts or
defective boot or compensator.
mounting hardware.
3-120. Levers and Linkage (Lever stand)
d. Adjustment.
a. General. Normal servicing of this equipment
(1) Make adjustment to mechanical linkage
will not require complete removal or disassembly of the
by lengtherning or shortening adjusting setscrews in
lever stand and its components, therefore,
these
lever stop bar (sheet 2 of fig. 3-100) or clevis at rod
instructions will cover individual component removal.
end.
a. Lever and Linkage Removal and Installation.
(2) Adjust the adjusting screws at both
compensator push rods until lever remains in neutral
when push rods are snug against piston.
Figure 3-100. Lever stand, showing compensator, lever, pedal and linkage removal
and adjustment points (sheet 1 of 2).
3-111


