TM 5-3810-305-23
0076
INSTALLATION - Continued
10.
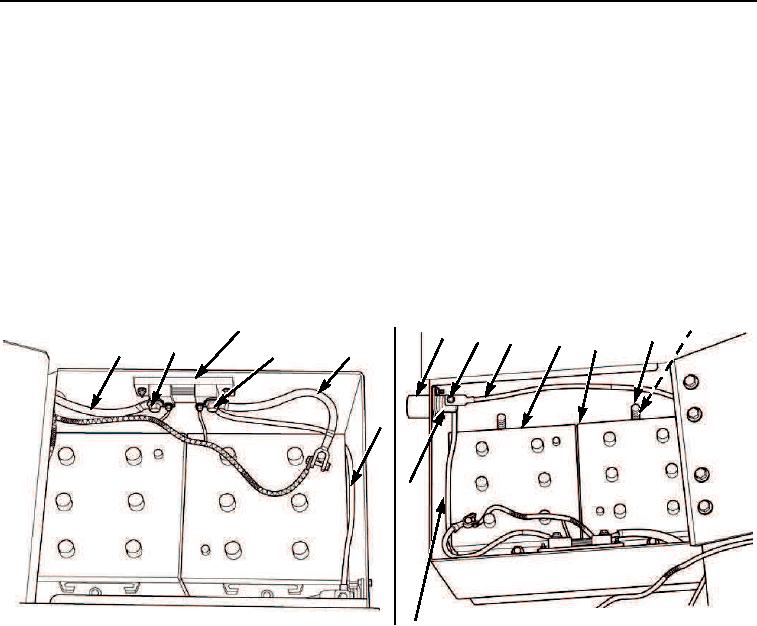
Connect cable (Figure 11, Item 1) to shunt (Figure 11, Item 4) and install lockwasher (Figure 11, Item 3) and
capscrew (Figure 11, Item 2).
11.
Install four bolts (Figure 11, Item 12) and new o-rings (Figure 11, Item 13).
12.
Install batteries (Figure 11, Items 10 and 11) into battery compartment.
13.
Install cables (Figure 11, Items 5 and 14), lockwasher (Figure 11, Item 3), and capscrew (Figure 11, Item 2)
to shunt (Figure 11, Item 4).
14.
Connect cable (Figure 11, Item 14) and install two lockwashers (Figure 11, Item 8) and capscrew
(Figure 11, Item 7) to slave receptacle (Figure 11, Item 6).
15.
Connect cable (Figure 11, Item 9) and install two lockwashers (Figure 11, Item 8) and capscrew
(Figure 11, Item 7) to slave receptacle (Figure 11, Item 6).
13
4
6
7,8 9
12
10
11
2,3
1
2,3
5
14
8,9
14
M0100105
Figure 11.
Battery and Cables Assembly Installation.
03/15/2011Rel(1.8)root(maintwp)wpno(M00082)

